Fixing a Dull Micro-Serrated Edge
Let us bring sharpness to you
Mobile knife sharpening serving Atlanta and the surrounding areas. We come to you, or catch us at a farmers market.
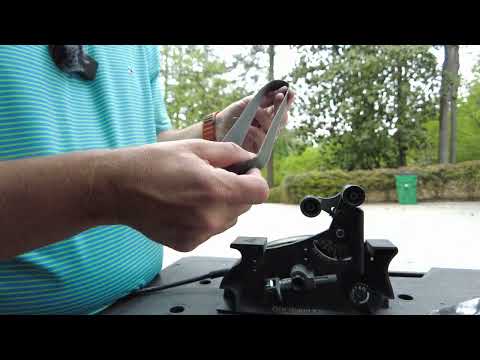
n this video, I walk through what we do when a micro-serrated knife is dull and we don’t have the equipment to re-cut the serrations. At that point, the only real option to get the knife sharp again is to grind the micro-serrations off and convert it to a smooth edge.
To do that, I use a worn P120 belt. This step removes a lot of material and is hard on belts, so there’s no reason to use a fresh one. Once the serrations appear to be gone, I do a quick sharpening pass to confirm they’re actually removed — sometimes they look and feel gone, but reappear right at the edge once sharpening begins.
After confirming the serrations are fully removed, I sharpen the knife normally. On this knife, the amount of material removed also meant the heel and back of the blade needed to be ground down so it would make proper contact with the cutting surface.
Hello everyone. Nate here with SimplySharp and today we’ve got this blade. It’s got all these little micro serrations in it. Let’s see if I can get that to show up on the camera. So, all these little micro serrations in there. Now, there’s not a lot we can do to sharpen that. Um, but what we can do, and what I’ve asked the customer for is we can get rid of them. So, I’m going to grind these off and uh rep-profile this, make this more of a regular straightedge knife. Um, and I’m going to show you how to do that here on the Ken Onion. All right. So, first things first is we are going to use a worn. Um, this is a worn P180. I would normally try to use like a P120 or lower, but this is what I have at the moment. Um, you just don’t want to use a new belt, a new belt. This is going to chew it up pretty good. Uh, and what I’m going to do is I’m going to start back here with the bolster. Um, I actually had already started it and then I thought maybe I should film this. So, we’re just gonna take this down a bit because we got we’re gonna have to take all that stuff off. So, I need to get this down a good bit. So, we’re gonna start there and we’re going to use the back platin here. Heat. So, I don’t know if you can see it. There’s still some of them in there. Now, a lot of them are going to come out when you sharpen, but it really sucks if you’re grinding away. Putting a new primary edge in here. really sucks if you’re grinding away, putting a new primary edge in here, and then those uh serrations keep popping up. So, we’re going to keep going just a little bit more. I’m also just going to set this up here on some sort of a nice flat plane so I can see like, hey, how have I done with that bolster reduction? I can tell there’s a little gap right back here. So, I’m going to keep taking this bolster down and I’m going to focus a little bit more on taking some of this edge off. Heat. Yes, that does sound really terrible. That’s cutting in a bevel. already. I can see I need to work on that bolt a little bit more. Heat. Heat. Okay. So, with this P180, um, I started cutting in the edge. And what I’m really looking for at this point is does look like I’ve got all the serrations out. Um, seems like I do. And so, now I’m going to switch up to our fresher P120. Now, this is basically just normal sharpening. Heat. There we go. I can hear coming up. Heat. All right. So, there we go. Um, don’t see any more of those serrations left. Uh, so yeah, basically I just need to finish the sharpening process on this knife and then there we go. A nice new straightedge knife.