Repairing a Shun on the Ken Onion.
Let us bring sharpness to you
Mobile knife sharpening serving Atlanta and the surrounding areas. We come to you, or catch us at a farmers market.
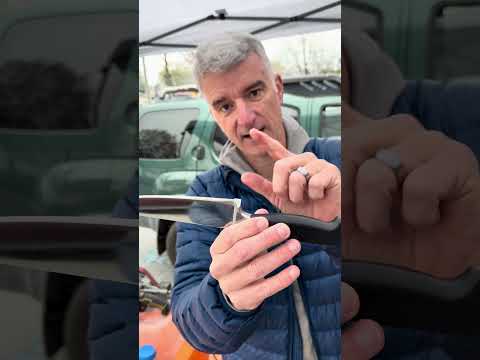
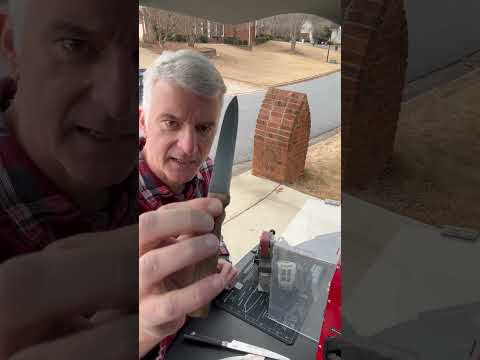
In this video, I take a Shun chef’s knife with a broken tip and several chips along the edge and walk through how to fully repair and sharpen it using the Work Sharp Ken Onion.
Whether you’re a new sharpener wanting to learn repair techniques, a Ken Onion user looking to see what’s possible, or someone wondering if your damaged knife can be saved—this video is for you.
What You’ll Learn
🔧 How to restore a broken tip 🛠️ How to safely remove chips from a blade ⚙️ Step-by-step sharpening workflow on the Ken Onion ✨ How to bring a premium knife back to a razor-sharp, like-new edge
A lot of people think a knife with a broken tip or chips is ruined forever—but most damage can be repaired. Before buying a new knife, check this out and see what’s actually possible with the right technique.
Hey guys, uh Nate here with SimplySharp and we’re going to go through some tip repair um on the Work Sharp. And um we’re going to start this with a worn P120. Um and the reason we’re use a worn one is because this is going to chew them up pretty good. Um but there’s a couple things that we’re going to highlight here. So several things need to happen to this knife. So, the tip is broken and this is a shun. And you see all those little chips in the edge of the knife. Super common. This happens all the time. Um, but we’re going to start with how to repair this tip. And a couple of the important things. We’re going to come off the back of the knife here, like the spine of the knife. Um, we’re not going to grind this part. And the reason is, you know, this is a three-dimensional shape that is thinner here than it is here. If we grind this, we’re getting thicker as we go down into it. So, if we come here, we’re going to maintain as much of this edge geometry as possible. That’s the first thing that we’re going to do. The other thing is we’re going to actually start from here and work our way back instead of start from here and work our way back instead of starting in the back and working our way forward. Um, the reason we’re going to do that is to kind of make sure that we’re managing the heat carefully, especially when we get to this point right here. Uh, and we’re also going to be um watching our temperature and using water when we need to kind of spray it down. And then after we’ve done that, we’re going to address this edge. So, uh, I’ll start this. Usually, um, you know, this Ken Onion Work Sharp, it’s the newer one. It one, two, three, four, five, has seven, uh, versions of speed. Uh, I’m usually at a one or two or usually I sharpen at a one, sometimes a two. Um, this time we’re really going to be at a two, maybe a three. This is not that severe, believe it or not. So, we’re going to just do a two. So, the very first thing I’m doing is just kind of conquering that very front part of it. Just kind of starting starting to get a shape cut in. making a nice good point on it. And so that’s pretty dang pointy, but it looks kind of jacked up. So now we’re just going to smooth that out and make it look better. Checking for heat. Like it’s a cold day. Um, this is not very hot yet at all, but it gets hot quick. And you want to stay on top of this. So, I’m going to go ahead and stop there. Um, if this was more severe, you’re going to have to come further and further back to really kind of blend it in nicely. Um, so, you know, looking pretty decent. Maybe I could do a little bit better right here. Um, so let me just touch that up just a smidge more. And then we’ll just do a little bit of this. Knock some of that edge off. There we go. So, that is a point nicely or tip nicely repaired on a Ken Onion with a worn P120. Now, we’re going to conquer this mess. Right. Um, now we could come in and just grind it off. Um, looking at these, we’re going to see what happens as we really get into. There’s a there’s a nice little dent in there. So, somebody was trying to do a little twisting. Maybe um maybe I shouldn’t be so judgmental, but um uh you know, just kind of looking at these, it’ll definitely be quicker just to grind this off. But we’re actually going to use the method where I come in at a much steeper angle first, get that edge ground, and then I’m going to uh come back and and put the uh final working edge back into it. So, we’re going to give that a try first. The thing to be aware of is some of these chips go deeper than you think. and um they’re just like as you start to grind them off, you won’t see them, but as you get further into the sharpening process, you’ll see them reappear. So, that’s something that you’re going to want to be aware of. It’s also something where, you know, you want to think about the timing involved. Um ultimately, you want to be respectful of the metal and take as little as possible and be as uh minimally aggressive as possible, which is why I’m going to start with this. But this approach can also take a lot longer because if you keep finding that chip that keeps reappearing, that can that can really heat up a lot of time. We’re going to give this a whirl here. Um, I have set the 10 onion to about 25°. Get them on speed two. I’m going to put a little bit of pressure into it. So, we’re going to want to make sure that we watch our heat. Still see a few of these. This is also where a fresh belt will help you out quite a lot. Um, and this is not quite as damaging to the belt is just bringing that edge off. Um, one more pass. We’ll see what we can do about that. Again, we have Sometimes I just leave those uh I don’t think it’s really going to affect the use of the knife. Um, eventually it’ll come out in the future. I’m pretty happy with that. So, I’m not seeing any. Um, but we’re about to find out. All right. So, I am going to go ahead switch to a fresher belt. Um, normally this is a P120. This is a P180 cuz I am apparently out of P120s in here today. So, P180 it is. Um, just sharpening Heat. Heat. So, what I said could happen appears to be happening. Um, let’s see if I can It’s right in the middle of my thumbnail. I don’t know if it’s showing up on the camera, but there is the smallest of chips that’s reappeared. And sometimes it sometimes it’s just in the bur itself, but then you know as you take the bur off, you see it’s still there. So I’m going to give this a few more passes and then we’re really going to find out when we refine this I’m not feeling great about that. I feel like once we get that bur off, we’re going to see it back in there. But let’s complete the process and I will either show you my failure and a lesson learned or great success. Maybe we might get lucky. We might get lucky. Forgot to turn my uh dust collector on. Heat. All right. I think we got lucky. All right. Um I don’t see a chip anywhere in there. So, this is a reason you’ve seen this in my other videos using um microfiber. If there’s a bur left on here, it’s going to grab, which is very minimally grabbing. You probably can’t see it. I can hear it. So, I still got a little bit more work to do. But also, if there was a chip in there, it would um uh you’d feel that hang up. Um, paper, in my opinion, paper is not a particularly effective uh test to tell you, did you do a good job sharpening a knife for its task? Like, this is a kitchen knife, right? So, it might cut through paper really well, but not do the best job ever in the kitchen. It might also not be cutting through paper and do perfectly fine in the kitchen. Um, what I do think paper is useful for is the things that maybe you’ve missed. Either you couldn’t see them or you couldn’t feel them or whatever. Um, so what we’re doing is we’re listening and feeling. If we have a drag, that’s some burr that’s still left on there. If we feel or hear a pop, that is a chip that we didn’t address. So, it sounds kind of rough. Um, that’s because we still need to polish it a little bit more. Um, but I didn’t see or or didn’t hear or feel any real pops. So, I don’t think we have any chips left in that blade. Let’s go and finish up. Yeah, that is buttery smooth. Can’t feel it, can’t see it, can’t hear it. Feels a lot butterier. It’s amazing what a little burr can do for to a knife. All right, there we go. Tip repaired, edge repaired.